The CLI at Netlify can detect project types to help make the user experience catered to that specific type of project. On my journey to make the Angular developer experience better I created the Angular detector. It was so easy I wanted to show you how to do it as well, so you can make detectors of your own if you fancy. After all, our CLI is open source!
It’s Just One File
The detector only consists of one JavaScript file and this is what it looks like for the Angular detector:
const { hasRequiredDeps, hasRequiredFiles, scanScripts } = require('./utils/jsdetect')
module.exports = function() {  // REQUIRED FILES  if (!hasRequiredFiles(['package.json'])) return false  if (!hasRequiredFiles(['angular.json'])) return false  // REQUIRED DEPS  if (!hasRequiredDeps(['@angular/cli'])) return false
  /** everything below now assumes that we are within angular */
  const possibleArgsArrs = scanScripts({    preferredScriptsArr: ['serve', 'start', 'build'],    preferredCommand: 'ng build --prod'  })
  if (possibleArgsArrs.length === 0) {    // offer to run it when the user does not have any scripts setup! 🤯    possibleArgsArrs.push(['ng', 'build', '--prod'])  }
  return {    type: '@angular/cli',    command: getYarnOrNPMCommand(),    port: 8888,    proxyPort: 4200,    env: { ...process.env },    possibleArgsArrs,    urlRegexp: new RegExp(`(http://)([^:]+:)${4200}(/)?`, 'g'),    dist: 'dist'  }}
It is pretty straightforward. We check for some required files, create a const reference to scripts and commands, add a script if one doesn’t exist, and finally return an object with more information. Let’s break this down a little more.
-
hasRequiredFiles– This will help distinguish what kind of project it is. In the Angular example, we first check for apackage.jsonso we can return immediately if it doesn’t have one. Because it’s definitely not an Angular project without one. Then we make sure there’s anangular.jsonfile, practically every Angular project will have this workspace configuration file. -
hasRequiredDeps– This is another way to make sure the project is using a certain type of software. For instance, all Angular projects will use the Angular CLI (@angular/cli) to run the build commands. -
possibleArgsArr.push– Lets you add a script that can be run if there are no scripts already setup. Here, I put the most common Angular build command,ng build --prod.
At the end of this file we return an object with these properties:
{ type: String, // e.g. gatsby, vue-cli command: String, // e.g. yarn, npm port: Number, // e.g. 8888 proxyPort: Number, // e.g. 3000 env: Object, // env variables, see examples possibleArgsArrs: [[String]], // e.g [['run develop]], so that the combined command is 'npm run develop', but we allow for multiple urlRegexp: RegExp, // see examples dist: String, // static folder where a _redirect file would be placed, e.g. 'public' or 'static'. NOT the build output folder}There are more notes in the detectors README.md, if you want a little more information. Now you have all the intel to build your own detector!
Contributing to the Netlify CLI
You have a detector file now, because you’re amazing, and want to add it to the CLI for others to benefit because, again, you’re amazing. The CLI project has a CONTRIBUTING.md file for full details but I’ll break down the steps here.
-
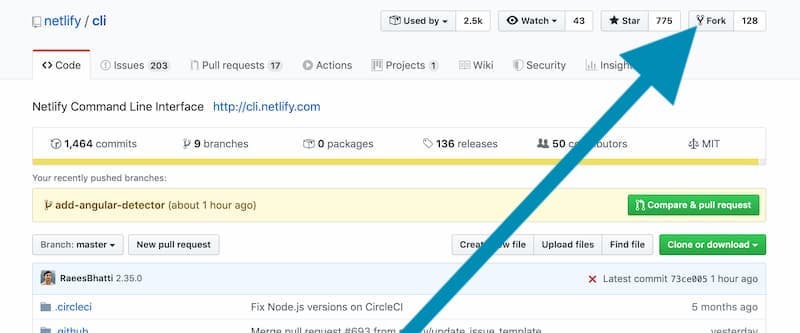
Fork the Netlify CLI repo
-
Clone the repo locally using your fork
git clone https://<your github username>/cli, so mine would begit clone https://github.com/tzmanics/cli -
Go into that directory and install the dependencies
cd cli && npm i -
Set the upstream to the Netlify version to keep it synced
git remote add upstream https://github.com/netlify/cli -
Create a branch to include your detector
git checkout -b awesome-new-detector -
Add your detector to
src/detectors/. Then change to a directory of a test project and run thenetlify devcommand using your new branch to make sure you didn’t break the CLI 😉. The CLI project also runs a few tests of its own when you submit a PR.cd /Users/tzmanics/Documents/PON/CODE/NETLIFY/angular-test-project"/Users/tzmanics/Documents/PON/CODE/NETLIFY/cli/bin/run" deveverything before
clishould be your path to your cloned CLI version

In this failed test you can see that it doesn’t detect any specifications so it falls back to the static site default (which won’t work for this site). Then it is also unable to determine the public folder. What we get is a ‘forbidden’ output in the browser.
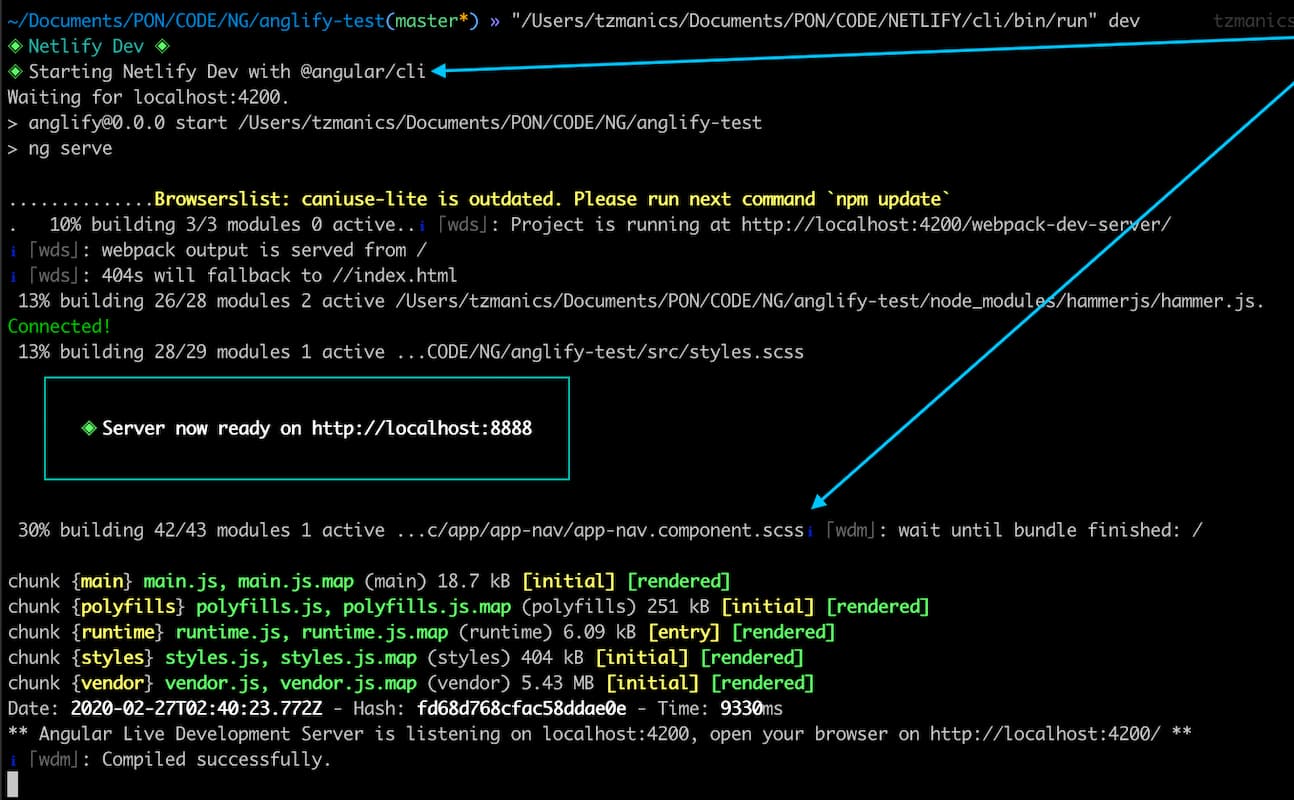

When the detector is successful, the output shows we’re working with correct tools, in this case
@angular/cliand the project is built successfully as well. In the browser, you can see that the test project I used (the default Angular skeleton app) is displayed correctly. This is right out the box without any Netlify configurations, woo hoo 👍! -
Add your changes to your Git staging area, commit, and push up your branch
git add src/detectors/awesomeness.jsgit commit -m 'adds an awesome detector'git push origin awesome-new-detector -
Go back to the Netlify CLI Repo to check your code and start your pull request

-
Create your pull request following the handy-dandy guide

-
🎊 celebrate your success 🎊
Okay, technically it was less than 10 steps, BUT celebrations should always be part of the process.
And done!
Thank you for coming on this fun journey with me. You can pretty much use this same process for contributing to all the open source parts of Netlify. Be sure to check the CONTRIBUTING.md docs though. I hope you find a detector of your own to add and can help make Netlify even more awesome for yourself and other Netlifriends. Happy coding!